Mesmerizing Hex Fidget
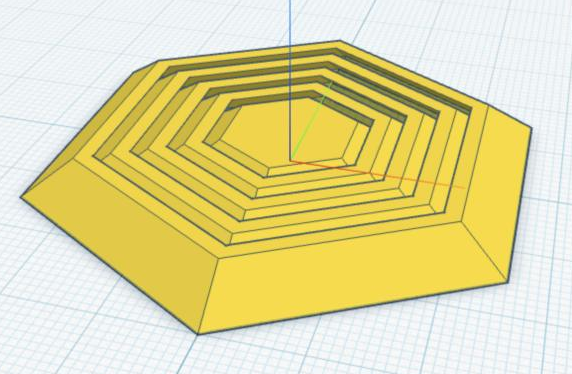
You will print a toy that comes off the printer already moving: nested hexagon rings that spin and rock inside each other, no assembly required.
Overview
Until now, everything you've printed has been one solid piece. This toy is five pieces — four rings and a center — and you'll print them already assembled, moving parts and all. That trick is called print-in-place, and the whole secret is a small gap between the pieces so the printer can't weld them together. The program is short, but it uses two blocks you haven't met: a conditional that decides when the rings are too small to keep making, and a block that counts a variable down as the program runs.
Builds on: sk8board Time! —
variables, math blocks, holes, grouping, and exporting to .STL.
You've got it when…
- Pressing Play draws nested rings around a solid center, and the rings come from one set of blocks inside a Repeat loop — not copies you placed by hand.
- An if/then block decides when the rings stop.
- You customized at least one variable, on purpose, within its range.
- Your
.STLfile is submitted in Google Classroom.
Collaboration & AI
Work: On your own. Ask a neighbor for a hand if you're stuck, but build your own fidget.
AI — AIAS Level 1, No AI: The two new blocks are the point of this lab — meet them yourself. What the levels mean.
Create the Project
-
Go to Tinkercad, sign in, click Create, then Codeblocks.
-
Click the random name at the top of the screen and rename your project Hex Fidget.
Variables
Four variables control this whole toy. You'll set them once now, and near the end of the lab you'll come back and turn these knobs to make your fidget yours.
-
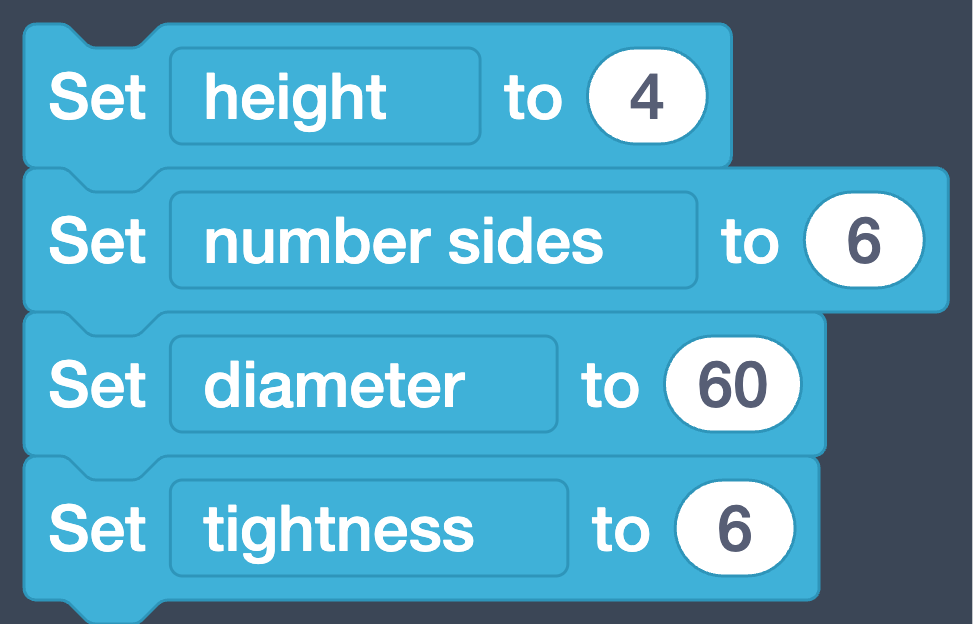
Create four number variables (Variables ▸ Create number variable…):
height,number sides,diameter, andtightness. -
Add four Set blocks and set the values shown.
Note
Nothing draws yet — variables only store numbers. What each one does, and how far you can push it, is coming in the Make It Yours section.
One Cone
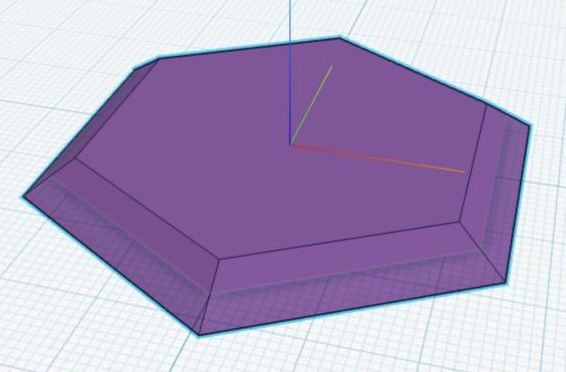
Each ring starts life as a cone with its top cut off — wider at the bottom than the top. That slant is the secret to the whole toy, and you'll see why in a moment.
-
Add a Cone and unfold its parameters. Set Sides to the
number sidesvariable and H toheight. -
Set Bottom Radius to the equation
diameter / 2. -
Set Top Radius to the equation
diameter / 2 - tightness.Order of operations, again
Same rule as the sk8board's wheelbase equation: divide first, then subtract — the division block sits inside the subtraction block. Built the other way,
2 - tightnessis negative, and your cone turns inside out. -
Add a Move block set to Z-axis min to 0.0, resting the cone on the Workplane.

Click Play. Your screen should look like this.
About the colors
Tinkercad picks each new shape's color for you, so your cone may not match the pictures. Shapes turn one shared color each time a Create Group combines them. Shape and position are what to check, not color.
Hollow It Out
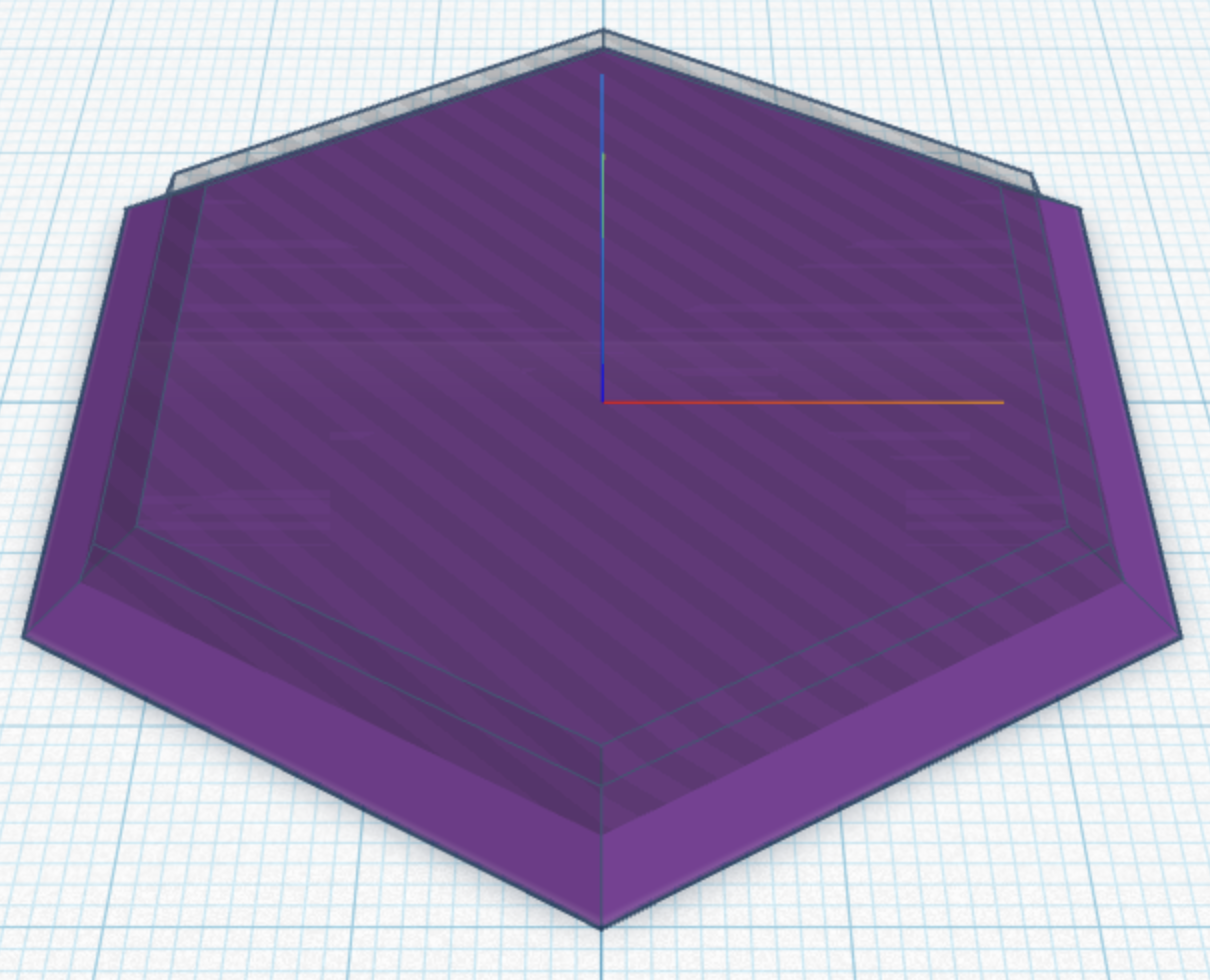
A ring is a cone with a slightly smaller cone punched out of it.
-
Right-click your Add Cone block and choose Duplicate — the whole block copies, equations and all. Snap the copy under the Move block.
-
On the copy: click the striped circle to make it a hole, change its Top Radius equation to
diameter / 2 - tightness - 2, and its Bottom Radius todiameter / 2 - 2. -
Add a Move block set to Z-axis min to 0.0 under it. You do not need to do this step if the Move block was already duplicated in step 9.

Click Play. Your screen should look like this.
Those 2s are the whole trick
The hole cone is 2 millimeters smaller than the next ring that will grow inside this one. That 2 mm of air is called clearance — a gap big enough that the printer can't fuse the pieces, small enough that the rings can't escape each other. Print-in-place lives or dies on it.
-
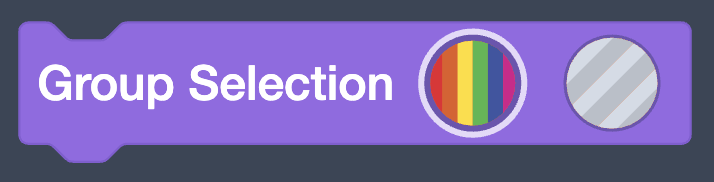
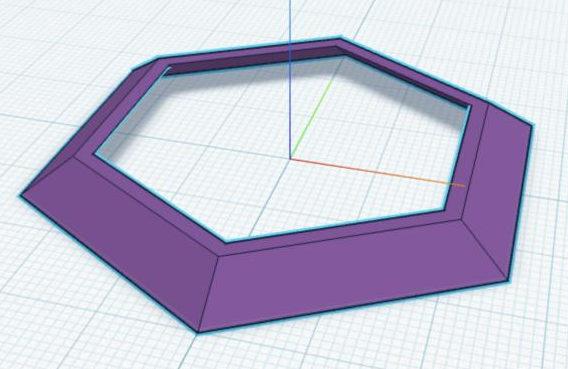
Add a Group Selection block. It combines the shapes above it — the hole does its cutting now.
Click Play. Your screen should look like this.
Mirror It
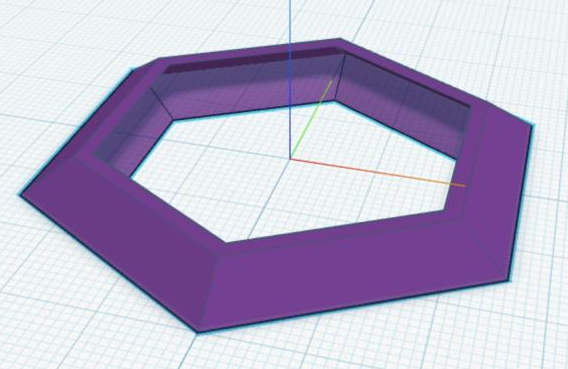
Right now the ring's wall slants one way, so an inner ring could slide up and fall out the top. Mirror the ring onto itself and the walls slant both ways — now an inner ring can rock up and down but never escape.
-
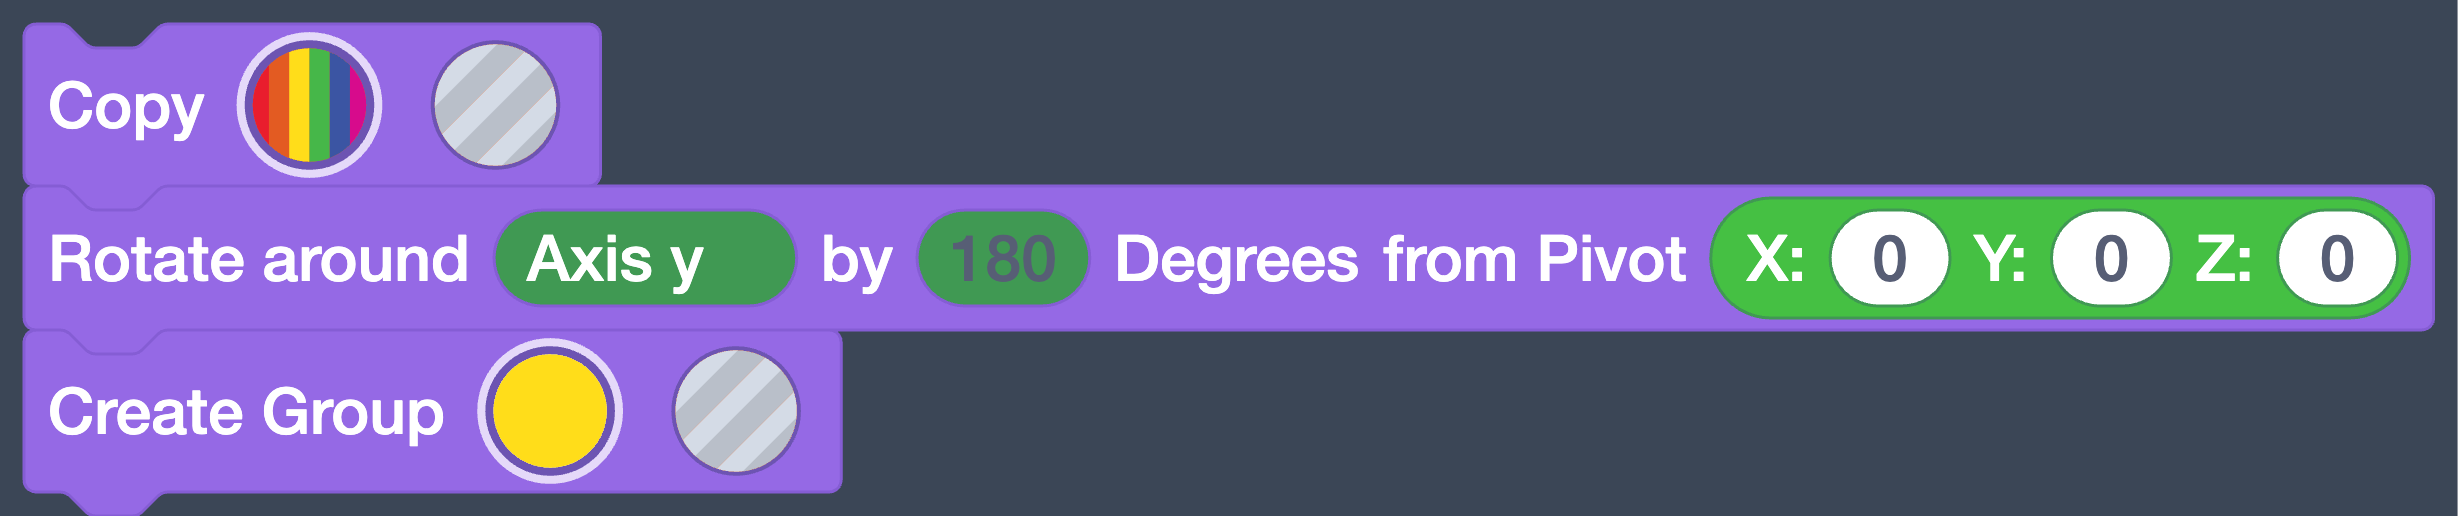
Add a Copy block.
-
Add a Rotate around block: Axis y by 180 degrees, from Pivot X 0, Y 0, Z 0.
-
Add another Create Group block to fuse the ring and its mirror image.
Click Play. Your screen should look like this.
Repeat It Inward
One ring down. The rest are the same blocks run again with a smaller
diameter — a job for a loop, plus one block you haven't met.
-
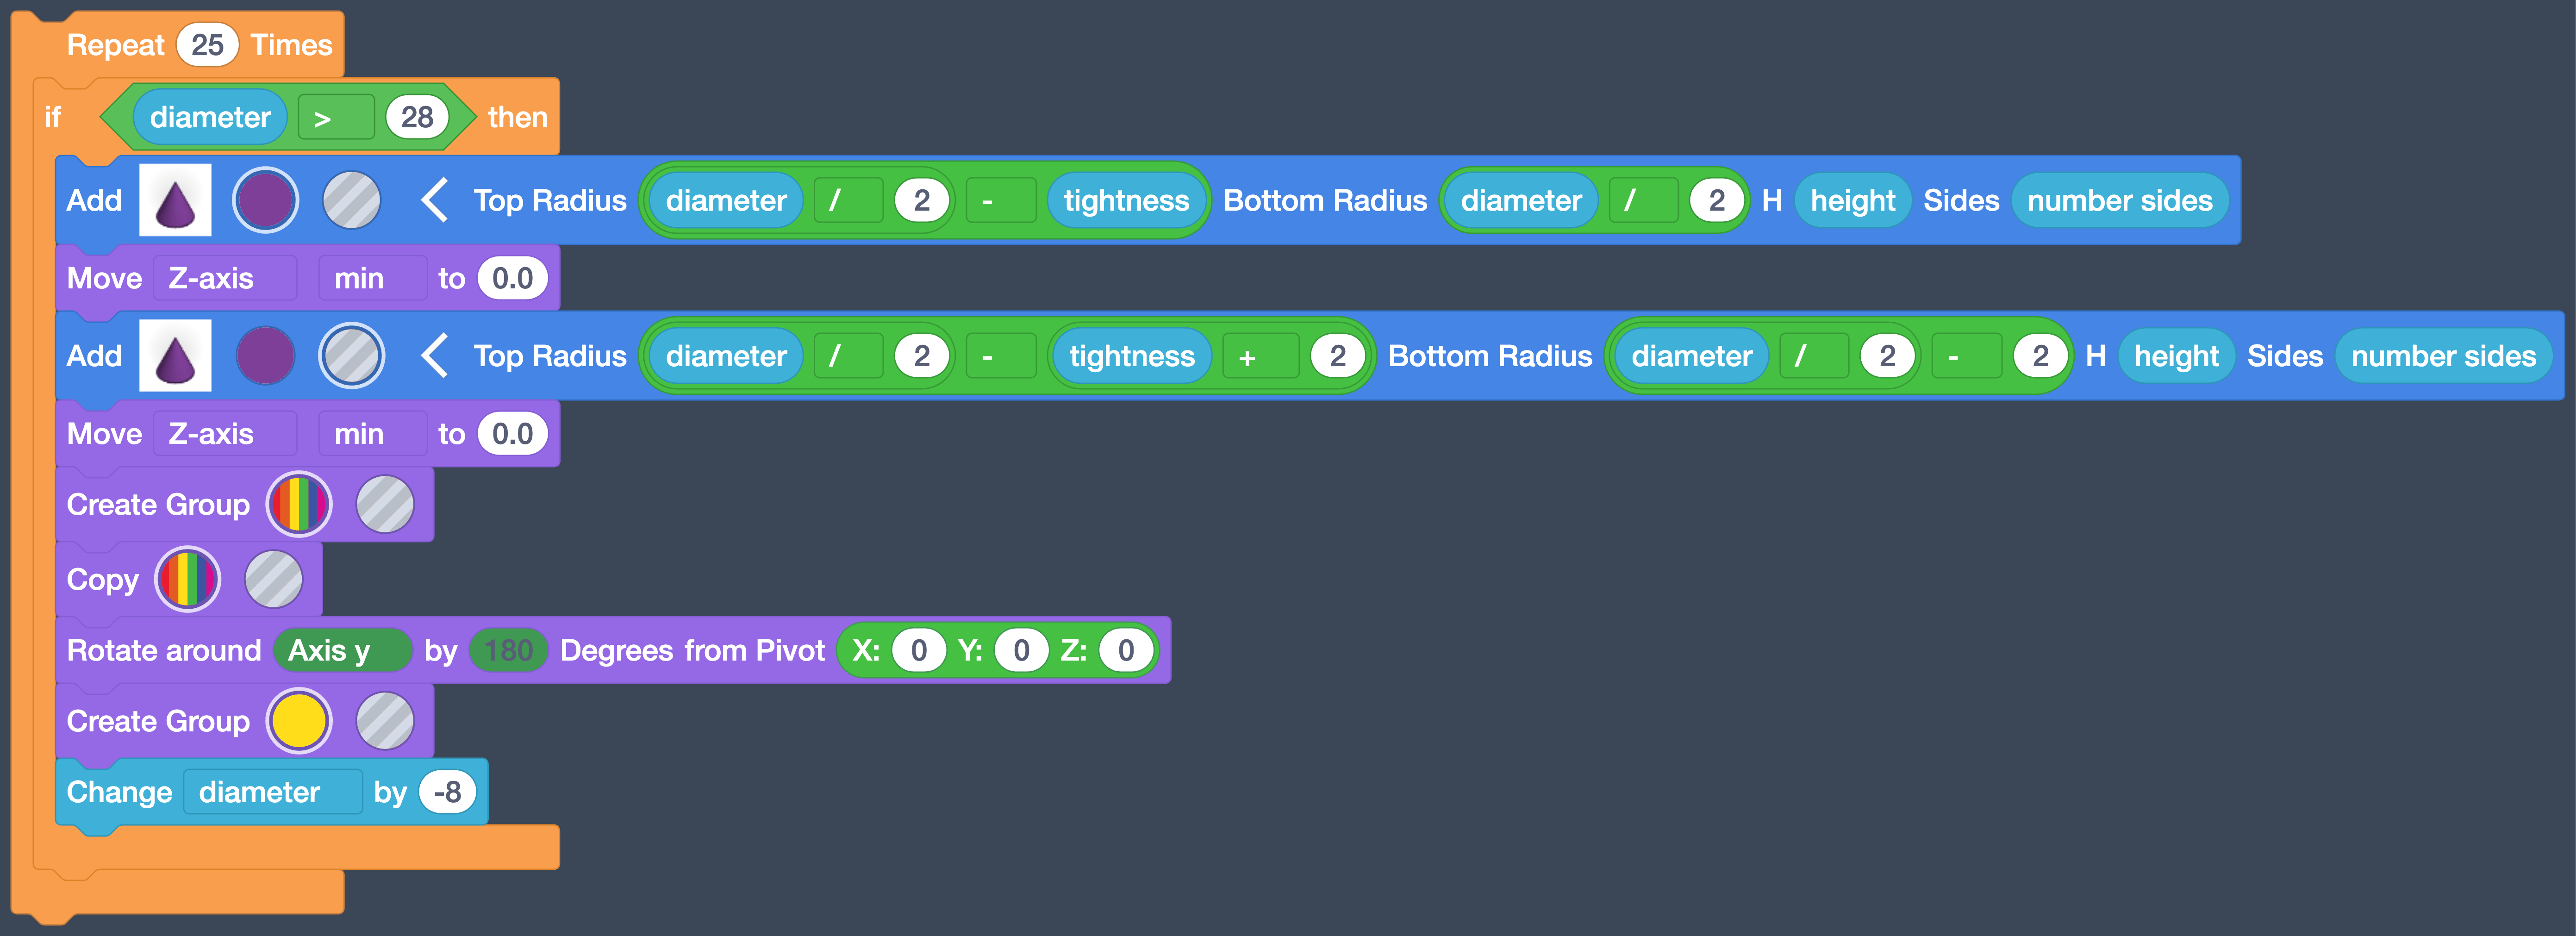
Drag a Repeat block from Control into an empty spot and set it to Repeat 25 Times.
-
Drag an if/then block from Control into the Repeat block's mouth.
-
Build the condition
diameter > 28in the if block's slot: drag the comparison block from Math into the slot, change its=to>, drag the rounddiametervariable into the left space, and type28in the right. -
Drag your whole ring stack — both cones, moves, groups, copy, and rotate — into the if block's mouth. Then snap the Repeat loop under your Set blocks.
The unit's first conditional
An if/then block runs its contents only when its condition is true. Ours asks a question every trip through the loop: is
diameterstill bigger than 28? While the answer is yes, another ring gets built. The first time the answer is no, the if block does nothing — and nothing is exactly what we want below 28 millimeters, where rings get too small to move freely. -
At the bottom of the if block's mouth, after the last Create Group, add a Change block from Variables: Change
diameterby -8.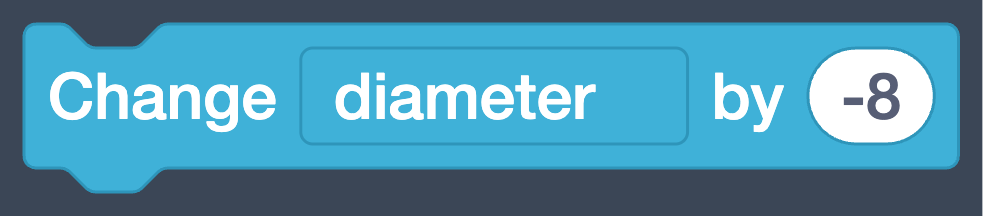
Click Play. Your screen should look like this.
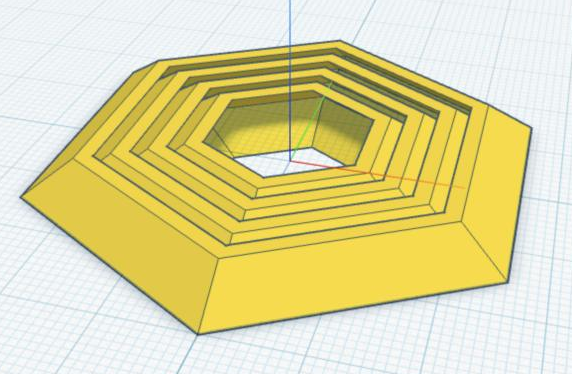
Counting down
Change by -8 subtracts 8 from
diameterevery trip through the loop: 60, 52, 44, 36… The loop offers 25 trips, but the if block only says yes whilediameteris above 28 — so with the starting values you get four rings, and the leftover trips do nothing. Changediameterlater and the same program builds more rings or fewer. That's the loop and the conditional working together.
The Center
The bullseye of the toy is a solid piece — the last diameter the if block
refused, built without the hole.
-
Start a second stack in an empty part of the workspace with a Comment block: Create the center. A program can have more than one stack; Play runs them all.
-
Add a Cone with the same four parameter equations as your first cone (Duplicate is your friend again), a Move block set to Z-axis min to 0.0, and a Create Group.
-
Mirror it the same way as the rings: Copy, Rotate around Axis y by 180 from Pivot 0, 0, 0, and Create Group.
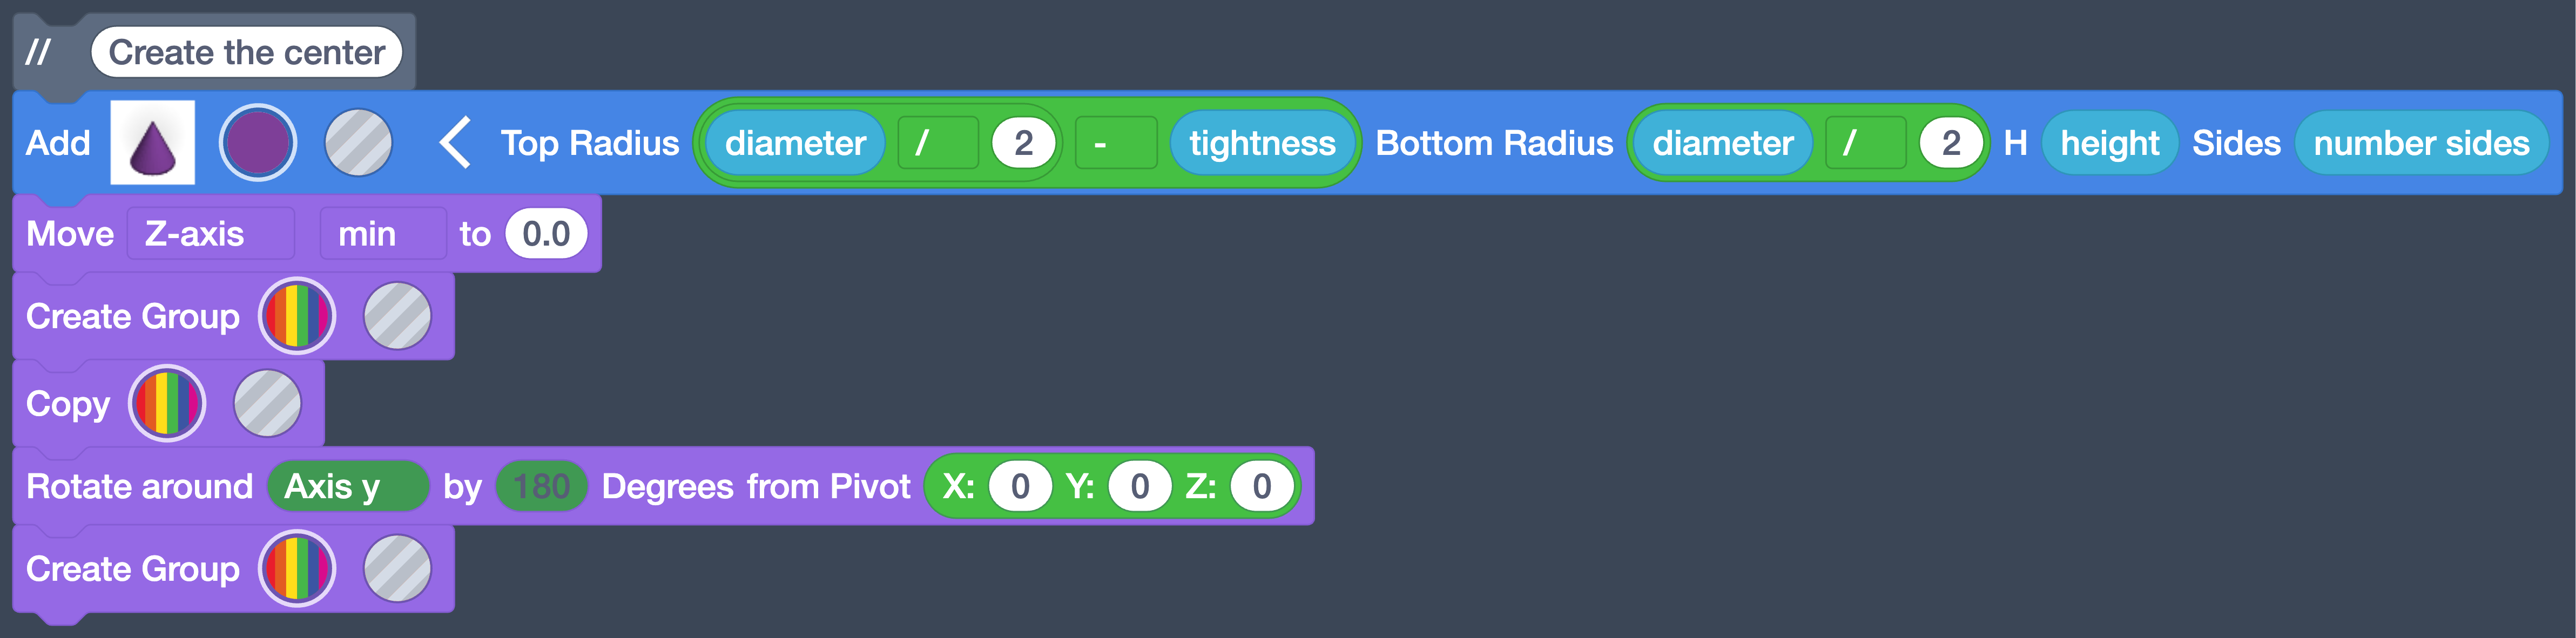
Click Play. Your screen should look like this.
Checkpoint
Count your ring blocks: one set, in one loop, plus a center. Count the rings on screen: four, nested, plus the bullseye. The loop and the if/then did the rest.
Make It Yours
Here's what each variable does, and how far it bends before it breaks. Change one at a time, predict what you'll see, then press Play and check yourself.
| Variable | What it does | Range |
|---|---|---|
height |
Thickness of the toy in millimeters. Thin prints fast and flexes; thick feels chunky in the hand. | 3 – 8 |
number sides |
How many flat sides each ring has. 6 is the hex in hex fidget; 3 is a triangle; past about 24 it looks round. | 3 – 64 |
diameter |
How wide the whole toy is, in millimeters — and, through the if block, how many rings it has. | 40 – 200 |
tightness |
How steep the ring walls slant. Lower numbers are looser — the rings rock farther and feel floppier. Higher numbers are tighter and shorter-travel. | 3 – 12 |
-
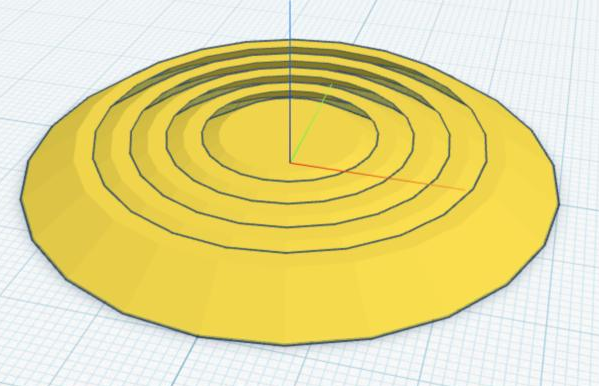
Set
number sidesto24. Predict first, then Play.Your screen should look like this.
-
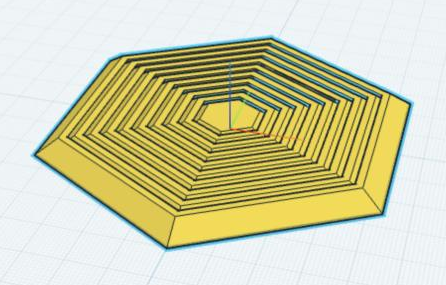
Set
diameterto100. Predict: wider, sure — but how many rings now? Play.Your screen should look like this.
-
Set every variable to the combination you actually want to print — anything you like, inside the ranges. Stay near
60fordiameterunless you want to wait on a very long print.
Outside the ranges
The ranges aren't decoration. Below 40, diameter leaves no room
for even one ring; a tightness below 3 can drop the clearance to
nothing and print as one welded lump. If your Play result looks
wrong, check the table before you blame the blocks.
Preparing for 3D Printing
We need to export the design in a format the 3D printing software can use.
-
Click the Share button
 in the upper
right corner.
in the upper
right corner. -
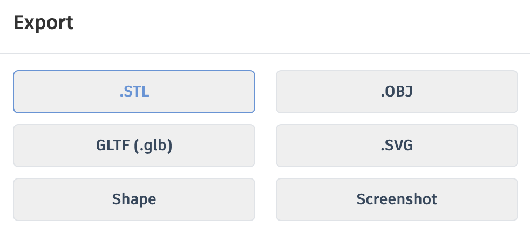
Select .STL
-
Submit your downloaded
.STLfile in Google Classroom.
Go Further: Claim the Center
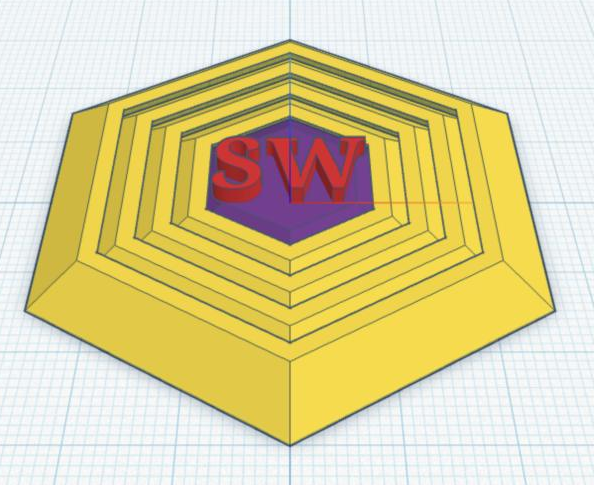
The center of your fidget is a solid hexagon about 20 millimeters across — a blank billboard. Put your initials on it, or a simple logo built from shapes. These blocks go at the end of your center stack, after its last Create Group:
- Add a Text shape from Shapes. Unfold it and replace
TEXTwith your initials — two or three letters fit best. - Add a Set size block: X 16, Y 8, Z 2 fits the center
at the default
diameter. -
Add a Move block set to Z-axis min to 4 — your
heightvalue — so the letters sit on the center's top face.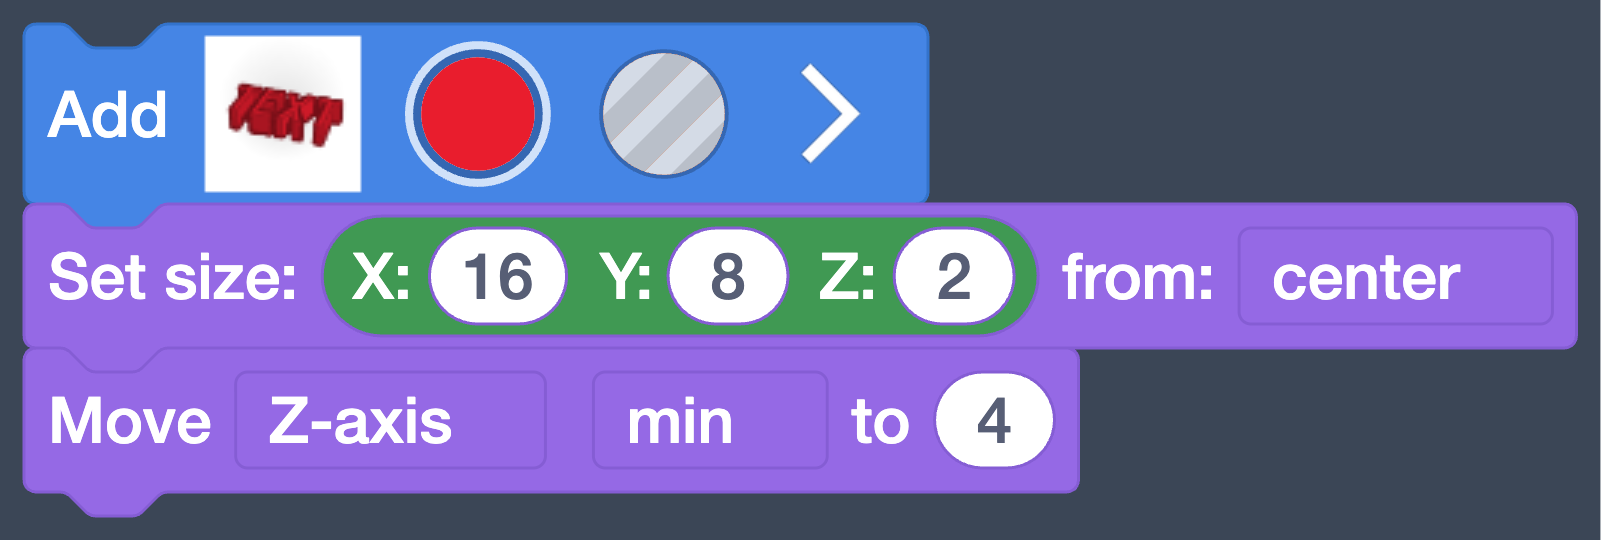
Click Play. Your screen should look like this.
-
That's the raised finish. For engraved letters instead, click the Text block's hole button and add one more Create Group at the end — the letters get carved into the face.
A logo works the same way: build it from basic shapes, size it to the center, raise it or sink it. One rule either way — keep your letters or logo on the center piece only. Anything hanging past the center's edge will weld your rings together, and a fidget that doesn't fidget is a coaster.
Turn It In
- Your hex fidget's
.STLfile, submitted in Google Classroom.
Credit: Adapted and updated from Print-in-Place Mesmerizing Hex Fidget Toy, modified to remove the use of Templates.
How It's Graded
This lab is worth up to 4 points. One score covers everything you turn in.
| Score | What it looks like |
|---|---|
| 4 — Excellent | Pressing Play draws the nested rings from one set of blocks inside the Repeat loop, the if/then stops them at the right size, the center piece is there — and your variables are deliberately set inside the documented ranges, so the toy you exported is one you designed, not just the defaults. The .STL is in Google Classroom. |
| 3 — Above Average | A complete, printable fidget with a slip — the defaults untouched, a value just outside its range, or the Change block's -8 typed as a positive number and corrected at the desk. |
| 2 — Average | A real gap — rings placed as hand-made copies instead of the loop, the if/then missing so tiny rings pile up in the center, or no center piece. |
| 1 — Below Average | A cone or a single ring, but the program never produced a fidget; or nothing exported. |
| 0 — Failing | Nothing submitted and no design in your account. |